Die Installation einer industriellen Kältemaschine ist nicht mit dem Einbau einer Klimaanlage zu vergleichen. Es handelt sich um ein größeres mechanisches Projekt, das elektrische Systeme, Sanitäranlagen, die Gebäudestruktur und manchmal sogar das örtliche Versorgungsunternehmen betrifft. Ich habe im Laufe der Jahre einige dieser Projekte beobachtet. Diejenigen, die gut laufen, haben etwas gemeinsam: Jemand hat den gesamten Ablauf durchdacht, bevor das erste Gerät auftaucht. Bei denjenigen, die schief gelaufen sind, wurde in der Regel ein Schritt übersprungen oder eine Annahme getroffen, die sich als falsch erwiesen hat.
Dies ist ein Überblick über die typischen Schritte für eine Industriekältesystem Installation und den Fehlern, die immer wieder auf den Baustellen auftauchen.

Planung vor der Installation eines industriellen Kältesystems
Bevor die Geräte eintreffen, gibt es einiges zu tun. In dieser Phase entscheidet sich, ob die Installation reibungslos verläuft oder ob es zu einer Reihe von Überraschungen kommt.
Standortbewertung
Der physische Raum muss bewertet werden. Nicht nur “Passt der Kühler”, sondern:
- Gibt es Platz für den Zugang zur Wartung? (Die Reinigung der Kondensatorspule, das Ziehen der Rohre und der Austausch des Kompressors benötigen alle Freiraum).
- Kann der Boden das Gewicht tragen? (Ein großer Kühler mit Kältemittel und Wasser kann mehrere Tonnen wiegen).
- Gibt es über der Decke Platz für die Montage? (Um eine Kältemaschine in einen Technikraum zu bringen, müssen manchmal Wände entfernt oder das Gerät durch das Dach gebracht werden).
Koordinierung der Versorgungsunternehmen
Die elektrische Versorgung muss bestätigt werden. Ein großes industrielles Kältesystem erfordert möglicherweise einen neuen Transformator oder eine Aufrüstung der Hauptschaltanlage. Die Vorlaufzeiten der Versorgungsunternehmen für die Installation von Transformatoren können sechs Monate oder mehr betragen. Das ist die Art von Verzögerung, die den Zeitplan eines Projekts zum Entgleisen bringt, wenn sie nicht frühzeitig behoben wird.
Genehmigungen
Mechanische, elektrische und manchmal auch sanitärtechnische Genehmigungen sind erforderlich. Einige Gerichtsbarkeiten haben spezielle Anforderungen für die Handhabung von Kältemitteln, seismische Verstrebungen oder die Abschirmung von Außenanlagen. Ein frühzeitiger Beginn des Genehmigungsverfahrens - noch vor der Bestellung der Geräte - verhindert, dass die Kältemaschine zwar ankommt, aber nicht installiert werden kann, weil die Genehmigung noch nicht erteilt wurde.
Schritt-für-Schritt-Installation eines industriellen Kältesystems
Sobald die Planung abgeschlossen ist, erfolgt die physische Installation in einer bestimmten Reihenfolge. Jeder Schritt hängt von dem vorhergehenden ab.
Schritt 1 - Vorbereitung des Standorts
Der Installationsbereich wird vorbereitet. Dies kann bedeuten, dass eine Betonplatte für ein Außengerät gegossen wird, die Dachkonstruktion für eine Aufdachinstallation verstärkt wird oder ein erhöhter Randstein für die Innenmontage mit entsprechender Entwässerung geschaffen wird. In dieser Phase werden Schwingungsdämpfer oder Federhalterungen installiert, um die Übertragung von Körperschall zu verhindern.
Schritt 2 - Einstellung des Kühlers
Die Kältemaschine wird in Position gebracht. Bei größeren Anlagen erfordert dies einen Kran, ein Montageteam und eine sorgfältige Koordination. Diejenigen, bei denen alles reibungslos verläuft, haben einen Plan für die Aufstellung, der die Gewichtsverteilung, die Zugangswege und die Hindernisse in der Höhe berücksichtigt. Wenn das nicht der Fall ist, steht die Kältemaschine manchmal tagelang auf dem Parkplatz, während jemand herausfindet, wie man sie durch eine zu schmale Türöffnung bekommt.
Schritt 3 - Installation der Rohrleitungen
Die Rohrleitungen verbinden die Kältemaschine mit den Prozessanlagen, den Pumpen und (bei wassergekühlten Geräten) dem Kühlturm. Hier kommt es auf die Details an.
Gemeinsame Rohrleitungselemente:
- Vor- und Rücklaufsammler sind für den richtigen Durchfluss dimensioniert
- Absperrventile an der Kältemaschine, die eine Wartung ohne Entleerung des gesamten Systems ermöglichen
- Schmutzfänger auf der Einlassseite zum Schutz des Kühlers vor Verunreinigungen
- Flexible Verbindungen zur Isolierung von Vibrationen
- Druck- und Temperaturanschlüsse zur Überwachung
Schritt 4 - Elektrische Anschlüsse
Der Strom wird von der Hauptverteilertafel zur Kältemaschine geleitet. Dies beinhaltet:
- Trennschalter in Sichtweite der Kältemaschine
- Richtige Dimensionierung der Leitung für die Stromstärke und die Entfernung
- Steuerverkabelung für die Kommunikation mit Gebäudeautomationssystemen
- Erdung gemäß Code
Schritt 5 - Kältemittel und Füllung
Bei Systemen, die mit Kältemittel geliefert werden, wird die Füllung überprüft. Bei Systemen, die vor Ort befüllt werden, wird das Kältemittel eingefüllt und das System auf Dichtheit geprüft. Dies ist ein entscheidender Schritt - undichte Stellen, die bei der Installation unbemerkt bleiben, werden später zu Servicefällen.
Schritt 6 - Füllen und Entleeren des Systems
Die Wasserseite wird befüllt, das System entlüftet und mit Chemikalien behandelt. Luft im System verursacht Lärm, verminderte Wärmeübertragung und mögliche Kavitation in den Pumpen. Ein ordnungsgemäßer Befüllungs- und Entlüftungsvorgang nimmt zwar Zeit in Anspruch, verhindert aber Kopfschmerzen bei der Inbetriebnahme.
Schritt 7 - Start und Inbetriebnahme
Hier kommt alles zusammen. Der Inbetriebnahmetechniker prüft:
- Betriebsdrücke und -temperaturen
- Durchflussmengen
- Steuerung von Sequenzen
- Sicherheitsverriegelungen
Ein formeller Inbetriebnahmebericht dokumentiert die Ausgangsleistung. Dieser Ausgangswert ist später bei der Behebung von Leistungsabweichungen von großem Nutzen.

Häufige Fehler bei der Installation von industriellen Kühlsystemen
Einige Fehler treten bei verschiedenen Projekten immer wieder auf. Wenn man sie im Voraus kennt, kann man sie vermeiden.
Fehler 1 - Ignorieren des Dienstzugangs
Der Kühler passt. Aber wenn es an der Zeit ist, die Kondensatorrohre zur Reinigung herauszuziehen, gibt es keinen Platz, um den Rohrzieher hineinzubekommen. Oder der Trennschalter befindet sich hinter der Kältemaschine, so dass eine Abschaltung erforderlich ist, nur um einen ausgelösten Unterbrecher zurückzusetzen. Der Zugang zu Wartungsarbeiten muss eingeplant werden, nicht vorausgesetzt.
Fehler 2 - Unterdimensionierte Rohrleitungen
Zu kleine Rohrleitungen verursachen einen übermäßigen Druckabfall. Die Kältemaschine könnte richtig dimensioniert sein, aber die Pumpen können nicht genug Wasser bewegen, um die Nennleistung zu liefern. Dieser Fehler ist nach der Installation teuer zu beheben, da er eine Neuverlegung der Rohre erfordert.
Fehler 3 - Unzureichende Wasseraufbereitung
Ein neues industrielles Kühlsystem kann bereits im ersten Jahr durch unbehandeltes Wasser beschädigt werden. Kalkablagerungen in den Kondensatorrohren, Korrosion im Verdampfer, biologisches Wachstum im Kühlturm - all das lässt sich mit einem angemessenen Wasseraufbereitungsprogramm vom ersten Tag an verhindern.
Fehler 4 - Überspringen der Integration von Steuerelementen
Die Kältemaschine läuft, aber sie kommuniziert nicht mit dem Gebäudeautomationssystem. Wenn die Gebäudeautomatisierung also Kühlung anfordert, passiert nichts. Oder die Kältemaschine läuft, wenn die Pumpen ausgeschaltet sind. Die Integration der Steuerungen muss während der Inbetriebnahme getestet werden, nicht erst nach dem Einzug.
Fehler 5 - Vergessen von Lärm
Eine luftgekühlte Kältemaschine, die in der Nähe einer Bürowand oder einer Grundstücksgrenze steht, kann zu Lärmbeschwerden führen. Einige Gemeinden haben strenge Lärmschutzverordnungen. Es ist einfacher, den Geräuschpegel zu prüfen und bei der Installation Lärmschutzwände oder geräuscharme Ventilatoren vorzusehen, als später nachzurüsten.
Besondere Überlegungen für verschiedene Kühlertypen
Die Vorgehensweise bei der Installation variiert je nach Art der Kältemaschine.
| Kühler Typ | Überlegungen zur Installation |
|---|---|
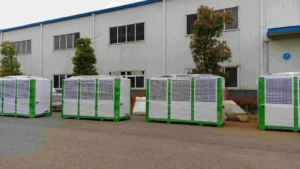
| Luftgekühlte Kältemaschine | Platzierung im Freien; Abstand um Verflüssigerregister; Schalldämmung; Frostschutz für die Wasserseite in kalten Klimazonen |
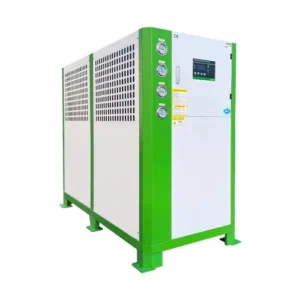
| Wassergekühlte Kältemaschine | Innenaufstellung üblich; Kühlturm oder Flüssigkeitskühler erforderlich; Verlegung von Kondensatorwasserleitungen; Wasseraufbereitung erforderlich |
Für eine wassergekühlte Kältemaschine, Die Installation des Kühlturms ist ein wichtiges Teilprojekt. Die Platzierung des Turms, die Frischwasserversorgung, die Beckenheizungen für den Winterbetrieb und die Tropfenabscheider müssen alle koordiniert werden. Für eine luftgekühlter Kühler, Der Schwerpunkt liegt auf dem Luftstrom - Geräte, die zu nahe an Wänden oder unter Überhängen angebracht sind, können die Wärme nur schwer ableiten.
Checkliste nach der Installation
Nachdem die Installation abgeschlossen und das System in Betrieb ist, sorgen einige wenige Schritte für langfristige Zuverlässigkeit.
1. Dokumentieren Sie den Ist-Zustand: Rohrleitungsdiagramme, elektrische Leitungen und Steuerungsabläufe sollten den tatsächlich installierten Zustand wiedergeben.
2. Bieten Sie eine Schulung für den Bediener an: Jemand vor Ort muss wissen, wie man Drücke überprüft, Einstellungen ändert und Warnzeichen erkennt.
3. Erstellen Sie einen Wartungsplan: Monatliche, vierteljährliche und jährliche Aufgaben sollten niedergeschrieben werden, bevor das System in Betrieb genommen wird.
4. Bewahren Sie Ersatzteile auf: Kritische Ersatzteile - Sicherungen, Filter, Riemen, Sensoren - verhindern längere Ausfallzeiten, wenn etwas nicht funktioniert.
Wenn Sie mehr über Industriekühler wissen möchten, lesen Sie bitte Wie Sie ein industrielles Kühlsystem in Ihre Fabrik integrieren.
FAQ
Wie lange dauert die Installation von industriellen Kältesystemen in der Regel?
Von der Lieferung der Ausrüstung bis zur Inbetriebnahme dauert die Installation bei einem einfachen Projekt in der Regel 2 bis 4 Wochen. Der gesamte Projektzeitraum, einschließlich Planung, Genehmigung und Koordination der Versorgungsunternehmen, kann zwischen 4 und 10 Monaten betragen.
Kann eine vorhandene Kältemaschine bei gleichem Platzbedarf durch eine neue ersetzt werden?
Häufig ja, aber die Rohrleitungsanschlüsse und elektrischen Anforderungen können unterschiedlich sein. Eine Standortbesichtigung vor der Bestellung von Geräten bestätigt, ob Änderungen erforderlich sind.
Welches ist der häufigste Installationsfehler, der zu einem frühzeitigen Versagen führt?
Eine unzureichende Wasseraufbereitung vom ersten Tag an ist eine der Hauptursachen für vorzeitige Rohrverschmutzung und Korrosion. Wenn man mit einem sauberen System, aber ohne chemisches Programm beginnt, sind Probleme innerhalb des ersten Jahres garantiert.