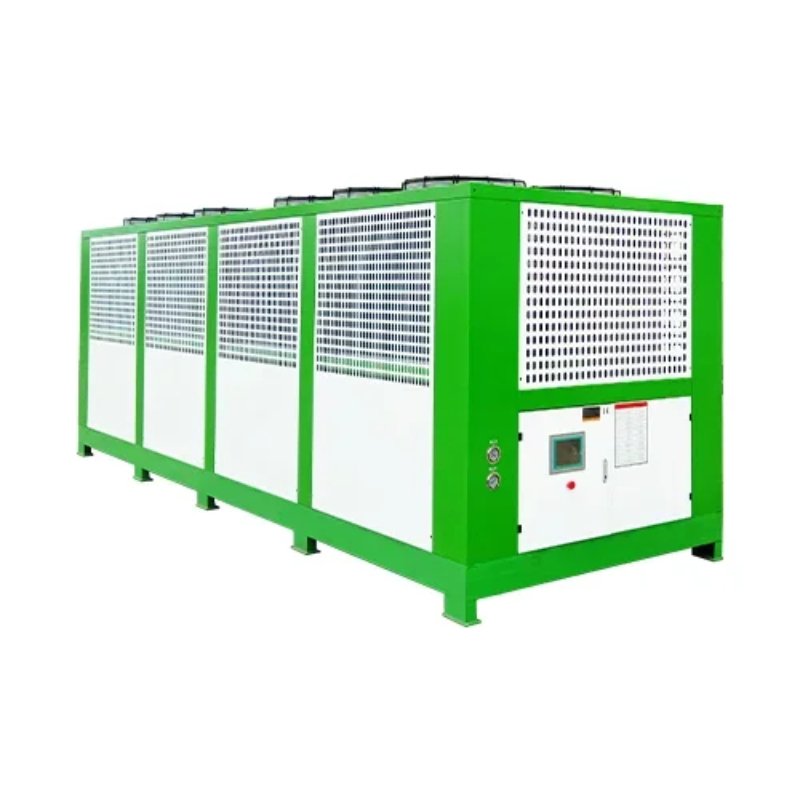
Die Installation eines industriellen Luftkühlers sieht auf dem Papier ganz einfach aus. Stellen Sie sie auf eine Unterlage, schließen Sie Strom und Rohrleitungen an und schalten Sie sie ein. In der Realität kann zwischen Lieferung und Inbetriebnahme eine Menge schiefgehen. Ich habe es mehr als einmal erlebt - eine Kältemaschine, die in der Fabrik einwandfrei funktioniert, aber an ihrem tatsächlichen Standort Probleme hat, weil etwas passiert ist, das bei der Installation hätte behoben werden können.
Der Unterschied zwischen einer reibungslosen und einer frustrierenden Installation liegt meist in ein paar Details. Keine komplizierten Dinge. Nur Dinge, die man leicht übersieht, wenn man unter Druck steht, das System zum Laufen zu bringen.
Dies ist ein Blick auf die praktische Industrieluftkühler Tipps für die Installation, basierend auf der Beobachtung, was funktioniert und was nicht.

Vorbereitung des Standorts für einen industriellen Luftkühler
Bevor die Kältemaschine überhaupt eintrifft, muss der Standort vorbereitet werden. Das ist der Punkt, an dem sich viele Projekte überschlagen.
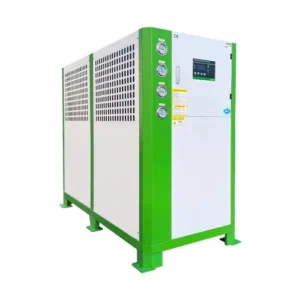
Unterlage und Fundament
Ein industrieller Luftkühler ist schwer. Ein großes Gerät kann mehrere Tonnen wiegen, und dieses Gewicht erfordert ein geeignetes Fundament. Ein einfaches Betonfundament reicht aus, muss es aber auch sein:
- Nivellierung (innerhalb von 1/8 Zoll über die gesamte Länge des Geräts)
- ausreichend dick (mindestens 4-6 Zoll für kleinere Einheiten; 8+ Zoll für größere)
- Verstärkt (Bewehrung oder Drahtgeflecht verhindert Rissbildung)
- Größer als die Grundfläche des Kühlers (zusätzliche 6-12 Zoll auf jeder Seite für Montageteile)
Es wurde beobachtet, dass zu dünne Pads mit der Zeit Risse bekommen, wodurch die Kühlmaschine aus dem Gleichgewicht gerät. Dadurch werden die Verdichterbefestigungen und die Rohrleitungsanschlüsse belastet.
Rigging und Zugang
Wie kommt die Kältemaschine vom Lieferwagen auf die Baustelle? Das klingt offensichtlich, aber es ist erstaunlich, wie oft es übersehen wird. Vielleicht wird ein Kran benötigt. Oder ein Gabelstapler mit ausreichender Kapazität. Oder ein freier Weg durch eine Türöffnung, wenn die Kältemaschine in einem Gebäude aufgestellt werden soll.
Einige Fragen, die vor dem Tag der Lieferung beantwortet werden sollten:
- Gibt es einen klaren Weg vom Lkw zur Bude?
- Ist der Boden fest genug für einen Kran oder Gabelstapler?
- Sind oberirdische Hindernisse (Stromleitungen, Äste) aus dem Weg geräumt?
- Wer ist für die Entladung und Positionierung verantwortlich?
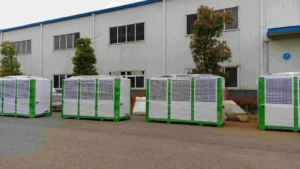
Freiraum für Luftstrom
Dies ist der häufigste Installationsfehler. Ein industrieller Luftkühler braucht Platz zum Atmen. Im Handbuch des Herstellers sind Mindestabstände angegeben - in der Regel 4 bis 6 Fuß an den Registerseiten und 6 bis 8 Fuß über den Ventilatoren. Die Nichtbeachtung dieser Vorgaben führt zu Rezirkulation (heiße Abluft wird zurück in die Register gesaugt), wodurch der Verflüssigungsdruck steigt und die Effizienz sinkt.
Als Faustregel gilt: Wenn ein Techniker nicht bequem um die Kältemaschine herumgehen kann, um die Spulen zu reinigen, ist der Abstand wahrscheinlich nicht ausreichend.
Überlegungen zur Verrohrung bei der Installation von industriellen Luftkühlern
Die Rohrleitungen verbinden die Kältemaschine mit dem Prozess. Hier verbergen sich auch viele Installationsprobleme.
Rohrdimensionierung und Material
Unterdimensionierte Rohrleitungen führen zu übermäßigem Druckabfall, was bedeutet, dass die Pumpen härter arbeiten und die Durchflussraten leiden. Überdimensionierte Rohre kosten mehr und brauchen mehr Platz. Die richtige Größe hält beides im Gleichgewicht.
Gängige Rohrleitungsmaterialien:
| Material | Am besten für | Achtung! |
|---|---|---|
| Kupfer | Kleinere Systeme, Kältemittelleitungen | Kosten, Korrosion unter bestimmten Wasserbedingungen |
| Stahl (schwarz oder verzinkt) | Große Wassersysteme | Rost; Verzinkung kann mit bestimmten Wasserbehandlungen reagieren |
| PVC/CPVC | Niedrigtemperaturwasser, chemische Beständigkeit | Temperaturgrenzen; UV-Zersetzung im Freien |
| HDPE | Erdverlegte Rohrleitungen, Korrosionsbeständigkeit | Erfordert eine Heißschmelzanlage |
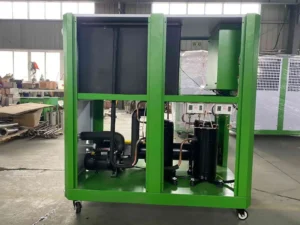
Schwingungsisolierung
Ein industrieller Luftkühler vibriert. Verdichter laufen, Ventilatoren drehen sich, Kältemittel pulsiert. Diese Schwingungen übertragen sich auf die Rohrleitungen und in das Gebäude. Starre Rohrverbindungen können durch die Bewegung reißen.
Flexible Verbindungen - Schwingungsisolatoren oder geflochtene Schlauchabschnitte - absorbieren diese Bewegung. Sie sollten sowohl an der Zu- als auch an der Rücklaufleitung so nah wie möglich an der Kältemaschine installiert werden.
Ventile und Entleerungsstellen
Einige wenige Ventile erleichtern die Wartung erheblich:
- Absperrventile an der Kältemaschine, die eine Wartung ohne Entleerung des gesamten Systems ermöglichen
- Ausgleichsventile zur Anpassung des Durchflusses an verschiedene Zonen
- Ablassventile an Tiefpunkten, um das System bei Bedarf zu entleeren
Das Überspringen von Absperrventilen ist ein häufiges Ärgernis. Wenn die Kältemaschine zum ersten Mal gewartet werden muss, muss jemand den gesamten Rohrleitungskreislauf entleeren. Das vergeudet Zeit, Wasser und Behandlungschemikalien.
Elektrische Installation für eine industrielle Luftkühlung
Die elektrische Seite einer industriellen Kaltwassersätze-Installation ist nicht der Ort für Abkürzungen.
Drahtdimensionierung und Schutz
Kaltwassersätze verbrauchen viel Strom, vor allem beim Anfahren. Die Drähte müssen für die Volllaststromstärke (FLA) plus eine Sicherheitsspanne bemessen sein. Unterdimensionierte Drähte überhitzen und können einen Spannungsabfall verursachen, der die Kompressoren beschädigt.
Es ist ein spezieller Trennschalter erforderlich, der sich in Sichtweite der Kältemaschine befindet. Der Trennschalter muss zugänglich sein - nicht hinter dem Gerät oder in einer Ecke.
Erdung und Verklebung
Eine ordnungsgemäße Erdung ist entscheidend. Eine Kältemaschine ohne gute Erdung kann zu Stromschlägen führen und Steuersysteme durcheinander bringen. Die Installation sollte Folgendes umfassen:
- Ein Erdungselektrodenleiter zur Gebäudeerde
- Verklebung zwischen dem Kühlerrahmen, den Rohrleitungen und allen Metallkomponenten
- Eine separate Erdung für Steuerungen, falls angegeben
Steuerung Verdrahtung
Neben der Stromversorgung benötigt die Kältemaschine eine Steuerungsverkabelung. Diese ist mit dem Gebäudemanagementsystem oder dem Industriekältesystem Steuerungen. Die Steuerkabel sollten getrennt von den Stromkabeln verlegt werden, um elektrische Störungen zu vermeiden. Für lange Strecken werden häufig abgeschirmte Kabel verwendet.
Inbetriebnahme und Prüfung
Die Installation ist erst dann abgeschlossen, wenn die Kältemaschine in Betrieb genommen und unter Last getestet wurde. Diese Phase wird manchmal überstürzt, aber das Überspringen von Schritten führt zu Problemen.
Checkliste vor dem Start
Bevor Sie den Strom einschalten, müssen Sie einige Dinge überprüfen:
1. Alle Transportbolzen und Halterungen entfernt (ja, das vergessen die Leute)
2. Rohrleitungsverbindungen dicht und leckfrei
3. Elektrische Verbindungen sind mit dem vorgeschriebenen Drehmoment angezogen
4. Spannung innerhalb von 10% des Typenschilds
5. Alle Ventile in der richtigen Position
6. Wasserkreislauf gefüllt und entlüftet
7. Schmutzfänger sauber
Erster Start
Die erste Inbetriebnahme sollte von einem qualifizierten Techniker überwacht werden, vorzugsweise vom Hersteller oder einem autorisierten Vertreter. Er wird prüfen:
- Drehrichtung des Verdichters (bei umgekehrter Drehrichtung werden Scrollverdichter schnell zerstört)
- Betriebsdrücke und -temperaturen
- Überhitzung und Unterkühlung
- Betrieb und Richtung des Gebläses
- Reaktion der Kontrolle
Dokumentation
Nach der Inbetriebnahme sollte die Installation dokumentiert werden. Ein Inbetriebnahmebericht, der Drücke, Temperaturen, Stromstärken und Sollwerte enthält, bildet die Grundlage für die künftige Fehlersuche. Ohne diesen Bericht ist es schwer zu sagen, ob ein Druckwert ein Jahr später normal ist oder abweicht.
Häufige Fehler bei der Installation
Einige wenige Fehler treten bei verschiedenen Projekten wiederholt auf.
- Unzureichender Freiraum für die Reinigung der Spulen. Die Kältemaschine funktioniert gut, wenn sie neu ist, aber nach einem Jahr Staubablagerung kann niemand die Spulen richtig reinigen.
- Keine Schwingungsisolierung. Risse in den Rohrleitungen an den Anschlüssen der Kältemaschine nach einigen Monaten des Betriebs.
- Unterdimensionierte Stromverdrahtung. Spannungsabfall beim Starten führt zu unerwünschten Auslösungen oder Schäden am Kompressor.
- Vergessen Sie den Gefrierschutz. Eine Kältemaschine, die in einem unbeheizten Raum ohne Glykol oder Heizgeräte installiert ist, friert in der ersten kalten Nacht ein.
- Überspringen der Spülung vor dem Start. Luft im Wasserkreislauf verursacht Geräusche, verminderten Durchfluss und potenzielle Pumpenkavitation.
Zusammenarbeit mit dem Rest des Systems
Ein industrieller Luftkühler arbeitet selten allein. Sie ist Teil eines größeren industriellen Kältesystems, das Pumpen, Rohrleitungen, Ventile und manchmal einen Kühlturm oder Flüssigkeitskühler umfasst. Bei der Installation muss berücksichtigt werden, wie diese Teile zusammenarbeiten.
Pumpen-Koordination
Die Kältemaschine benötigt einen ausreichenden Durchfluss. Wenn die Pumpen nicht richtig dimensioniert oder eingestellt sind, kann die Kältemaschine kurzschließen oder einfrieren. Der Pumpenstart sollte mit dem Betrieb der Kühlmaschine koordiniert werden - normalerweise startet die Pumpe vor dem Verdichter der Kühlmaschine und stoppt nach ihm.
Integration von Steuerelementen
Die Steuerungen der Wasserkühlmaschine müssen mit dem Rest des Systems kommunizieren. Das bedeutet eine Verkabelung für Start-/Stoppsignale, Alarme und manchmal eine Sollwertanpassung. Eine Kältemaschine, die unabhängig vom Gebäudeautomationssystem läuft, ist schwieriger zu verwalten und weniger effizient.
Schlussfolgerung
Die Installation eines industriellen Luftkühlers ist keine Raketenwissenschaft, aber es ist auch nichts, was man überstürzen sollte. Diejenigen, die fünfzehn oder zwanzig Jahre lang zuverlässig arbeiten, haben in der Regel einige Dinge von Anfang an richtig gemacht: den richtigen Abstand für den Luftstrom, korrekt dimensionierte Rohrleitungen, gute Schwingungsisolierung und eine gründliche Inbetriebnahme durch jemanden, der weiß, worauf er achten muss. Bei denjenigen, die Probleme haben, wird oft an denselben Details gespart.
Wenn man sich die Zeit nimmt, die Installation richtig zu machen - mit erfahrenen Auftragnehmern zu arbeiten, die Freigaben des Herstellers zu befolgen und die Inbetriebnahme zu dokumentieren - zahlt sich das durch geringere Wartungskosten und weniger Notrufe aus. Eine gut installierte Kältemaschine ist eine Kältemaschine, die meistens einfach nur läuft, und das ist genau das, was man sich von ihr wünscht.
Wenn Sie mehr über industrielle Luftkühler wissen möchten, lesen Sie bitte Wie man die richtigen luftgekühlten Industriekühler auswählt.
FAQ
Wie viel Freiraum braucht ein industrieller Luftkühler?
Normalerweise 4-6 Fuß an den Seiten des Wärmetauschers und 6-8 Fuß über dem Ventilatorauslass. Die genauen Zahlen finden Sie im Handbuch des Herstellers - sie variieren je nach Modell.
Kann ich einen industriellen Luftkühler selbst installieren?
Die Installation umfasst Elektro-, Rohrleitungs- und Montagearbeiten, für die in der Regel zugelassene Bauunternehmen erforderlich sind. Die meisten Hersteller verlangen für die Garantieabdeckung eine autorisierte Inbetriebnahme.
Was ist der häufigste Fehler bei der Installation?
Unzureichender Freiraum für den Luftstrom und die Spulenreinigung. Die Kältemaschine passt, aber niemand kann sie richtig warten, was zu Leistungsverlusten und frühzeitigem Ausfall führt.