Instalar un enfriador industrial no es como instalar un aire acondicionado de ventana. Es un proyecto mecánico de gran envergadura que afecta a los sistemas eléctricos, la fontanería, la estructura del edificio y, a veces, incluso a la empresa local de servicios públicos. A lo largo de los años, he visto cómo se realizaban unos cuantos. Los que salen bien tienen algo en común: alguien pensó en toda la secuencia antes de que apareciera la primera pieza del equipo. Los que salen mal suelen saltarse un paso o hacer una suposición que resulta ser errónea.
A continuación se describen los pasos típicos de un sistema de refrigeración industrial instalación, junto con los errores que siguen apareciendo en las obras.

Planificación previa a la instalación de un sistema de enfriadoras industriales
Antes de que llegue cualquier equipo, hay trabajo que hacer. Esta fase determina si la instalación transcurre sin contratiempos o se convierte en una serie de sorpresas.
Evaluación del emplazamiento
Hay que evaluar el espacio físico. No sólo “cabe el refrigerador”, sino:
- ¿Hay espacio para el mantenimiento? (La limpieza de la batería del condensador, la extracción de tubos y la sustitución del compresor requieren espacio libre).
- ¿Puede el suelo soportar el peso? (Una gran enfriadora con refrigerante y agua puede pesar varias toneladas).
- ¿Hay espacio por encima de la cabeza para el aparejo? (Para introducir una enfriadora en un cuarto de máquinas a veces hay que quitar paredes o meterla por el techo).
Coordinación de servicios públicos
Es necesario confirmar el servicio eléctrico. Un sistema de enfriadoras industriales de gran tamaño puede requerir un nuevo transformador o una actualización del cuadro eléctrico principal. Los plazos de entrega para la instalación de transformadores pueden ser de seis meses o más. Es el tipo de retraso que hace descarrilar el calendario de un proyecto si no se soluciona pronto.
Permisos
Se requieren permisos mecánicos, eléctricos y, a veces, de fontanería. Algunas jurisdicciones tienen requisitos específicos para la manipulación de refrigerantes, el apuntalamiento sísmico o la protección de los equipos exteriores. Empezar a tramitar los permisos con antelación -antes de encargar el equipo- evita que la enfriadora llegue pero no pueda instalarse porque no se ha concedido el permiso.
Instalación paso a paso de un sistema de enfriadoras industriales
Una vez finalizada la planificación, la instalación física sigue una secuencia. Cada paso depende del anterior.
Etapa 1 - Preparación del terreno
Se prepara la zona de instalación. Esto puede significar el vertido de una plataforma de hormigón para una unidad exterior, el refuerzo de la estructura del tejado para una instalación en la azotea o la creación de un bordillo elevado para el montaje interior con un drenaje adecuado. En esta fase se instalan almohadillas de aislamiento de vibraciones o soportes elásticos para evitar la transmisión del ruido estructural.
Paso 2 - Ajuste del enfriador
El enfriador se coloca en su sitio. En el caso de las unidades más grandes, esto implica una grúa, un equipo de aparejos y una cuidadosa coordinación. Los equipos que funcionan bien tienen un plan de montaje que tiene en cuenta la distribución del peso, las vías de acceso y los obstáculos aéreos. Los que no, a veces acaban con una enfriadora en el aparcamiento durante días mientras alguien averigua cómo pasarla por una puerta 15 centímetros demasiado estrecha.
Paso 3 - Instalación de tuberías
Las tuberías conectan la enfriadora con el equipo de proceso, las bombas y (en el caso de las unidades refrigeradas por agua) la torre de refrigeración. Aquí es donde importan los detalles.
Elementos comunes de las tuberías:
- Colectores de alimentación y retorno dimensionados para un caudal adecuado
- Válvulas de aislamiento en el enfriador para permitir el mantenimiento sin vaciar todo el sistema
- Filtros en el lado de entrada para proteger el enfriador de los residuos
- Conexiones flexibles para aislar las vibraciones
- Puertos de presión y temperatura para control
Paso 4 - Conexiones eléctricas
La alimentación se realiza desde el panel de distribución principal hasta el enfriador. Esto incluye:
- Interruptor de desconexión a la vista del enfriador
- Dimensionamiento adecuado de los cables en función de la ampacidad y la distancia
- Cableado de control para comunicación con sistemas de automatización de edificios
- Conexión a tierra según el código
Paso 5 - Refrigerante y carga
Para los sistemas enviados con refrigerante, se verifica la carga. En los sistemas cargados in situ, se añade refrigerante y se comprueban las fugas. Se trata de un paso fundamental, ya que las fugas que pasan desapercibidas durante la instalación se convierten más tarde en llamadas al servicio técnico.
Paso 6 - Llenado y purga del sistema
Se llena el lado del agua, se purga el aire del sistema y se añade tratamiento químico. El aire en el sistema produce ruido, reduce la transferencia de calor y puede provocar cavitación en las bombas. Un proceso adecuado de llenado y purga lleva tiempo, pero evita quebraderos de cabeza durante la puesta en marcha.
Paso 7 - Puesta en marcha
Aquí es donde todo confluye. El técnico de puesta en marcha verifica:
- Presiones y temperaturas de funcionamiento
- Caudales
- Secuencias de control
- Enclavamientos de seguridad
Un informe formal de puesta en marcha documenta el rendimiento de referencia. Esa línea de base será útil más adelante para solucionar problemas de desviación del rendimiento.

Errores comunes durante la instalación de enfriadoras industriales
Algunos errores se repiten en distintos proyectos. Conocerlos de antemano ayuda a evitarlos.
Error 1 - Ignorar el acceso a los servicios
El refrigerador cabe. Pero cuando llega el momento de extraer los tubos del condensador para limpiarlos, no hay espacio para meter el extractor de tubos. O el interruptor de desconexión está situado detrás de la enfriadora, lo que obliga a desconectarla sólo para restablecer un disyuntor disparado. El acceso para el mantenimiento debe diseñarse, no suponerse.
Error 2 - Tuberías subdimensionadas
Las tuberías demasiado pequeñas generan una caída de presión excesiva. La enfriadora puede tener el tamaño correcto, pero las bombas no pueden mover suficiente agua para suministrar la capacidad nominal. Este error es caro de subsanar después de la instalación, ya que requiere una nueva instalación de tuberías.
Error 3 - Tratamiento inadecuado del agua
Un sistema nuevo de enfriadoras industriales puede resultar dañado en su primer año por agua no tratada. Incrustaciones en los tubos del condensador, corrosión en el evaporador, crecimiento biológico en la torre de refrigeración... todo ello puede evitarse con un programa adecuado de tratamiento del agua desde el primer día.
Error 4 - Omitir la integración de controles
La enfriadora funciona, pero no se comunica con el sistema de automatización del edificio. Así que cuando la automatización del edificio pide refrigeración, no pasa nada. O la enfriadora funciona cuando las bombas están apagadas. La integración de los controles debe probarse durante la puesta en marcha, no descubrirse después de la ocupación.
Error 5 - Olvidarse del ruido
Una enfriadora por aire situada cerca de la pared de una oficina o de un límite de propiedad puede generar quejas por ruido. Algunos municipios tienen ordenanzas estrictas sobre el ruido. Comprobar los niveles sonoros y colocar barreras o ventiladores de bajo nivel sonoro durante la instalación es más fácil que realizar una adaptación posterior.
Consideraciones especiales para los distintos tipos de enfriadoras
El método de instalación varía en función del tipo de enfriadora.
| Tipo de enfriador | Consideraciones sobre la instalación |
|---|---|
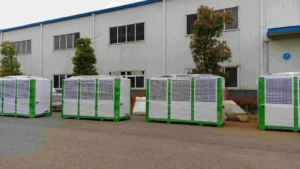
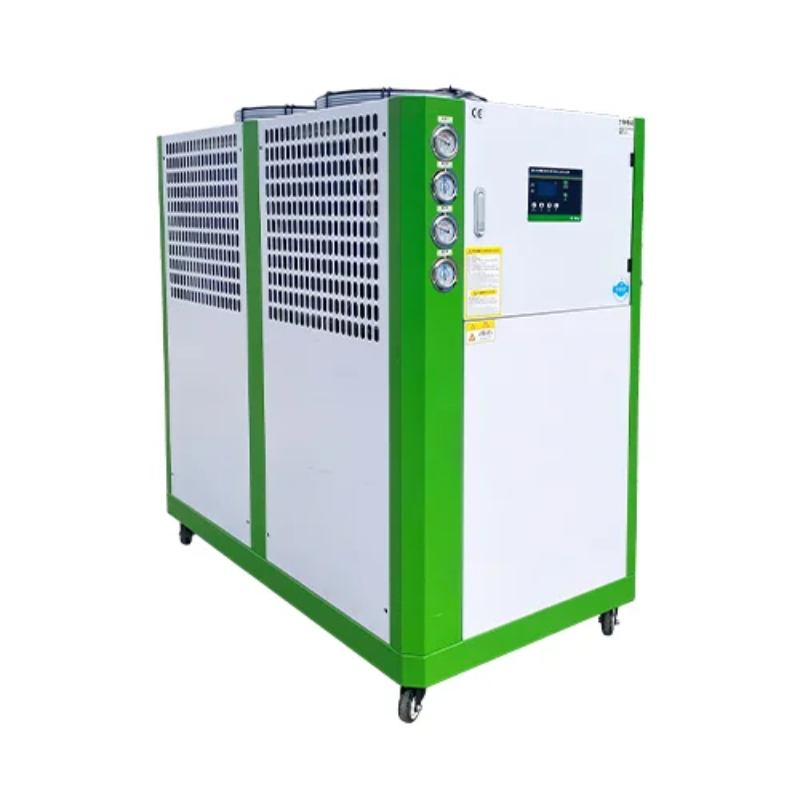
| Refrigerador por aire | Colocación en el exterior; espacio libre alrededor de las baterías del condensador; atenuación acústica; protección contra la congelación del lado del agua en climas fríos. |
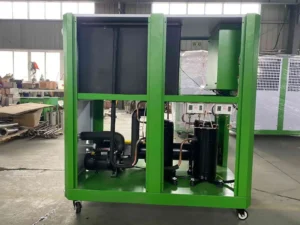
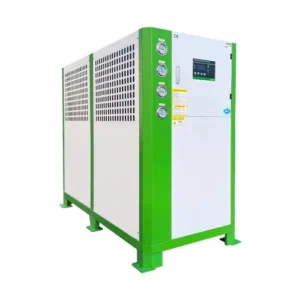
| Refrigerador por agua | Colocación común en interiores; torre de refrigeración o enfriador de fluidos necesario; tuberías de agua del condensador; tratamiento de agua esencial. |
Para un refrigerador por agua, La instalación de la torre de refrigeración es un subproyecto importante. Es necesario coordinar la ubicación de la torre, el suministro de agua de reposición, los calentadores de la balsa para el funcionamiento en invierno y los eliminadores de gotas. Para refrigerador por aire, Las unidades situadas demasiado cerca de las paredes o bajo los voladizos tienen dificultades para evacuar el calor correctamente.
Lista de comprobación posterior a la instalación
Una vez terminada la instalación y en marcha el sistema, unos pocos pasos garantizan la fiabilidad a largo plazo.
1. Documente las condiciones de construcción: Los diagramas de tuberías, las líneas eléctricas y las secuencias de control deben reflejar lo que realmente se instaló.
2. Impartir formación a los operarios: Alguien en el lugar debe saber cómo comprobar las presiones, cambiar los ajustes y reconocer las señales de advertencia.
3. Establezca un calendario de mantenimiento: Las tareas mensuales, trimestrales y anuales deben anotarse antes de poner el sistema en producción.
4. Conserve las piezas de repuesto: Los repuestos críticos -fusibles, filtros, correas, sensores- evitan tiempos de inactividad prolongados cuando algo falla.
Si quiere saber más sobre enfriadoras industriales, lea Cómo integrar un sistema de enfriadoras industriales en su fábrica.
PREGUNTAS FRECUENTES
¿Cuánto suele durar la instalación de un sistema de enfriadoras industriales?
Desde la entrega del equipo hasta la puesta en marcha, la instalación suele durar de 2 a 4 semanas en un proyecto sencillo. El plazo total del proyecto, incluida la planificación, la obtención de permisos y la coordinación de servicios, puede oscilar entre 4 y 10 meses.
¿Puede sustituirse una enfriadora existente por una nueva en el mismo espacio?
A menudo sí, pero las conexiones de las tuberías y los requisitos eléctricos pueden variar. Un estudio del emplazamiento antes de encargar el equipo confirma si son necesarias modificaciones.
¿Cuál es el error de instalación más común que conduce al fracaso prematuro?
Un tratamiento inadecuado del agua desde el primer día es uno de los principales factores que contribuyen al ensuciamiento prematuro de los tubos y a la corrosión. Empezar con un sistema limpio pero sin un programa químico garantiza problemas durante el primer año.